6L80 Transmission Pan Torque Specs: A Comprehensive Guide (Updated 04/15/2026)
This comprehensive guide details 6L80 transmission pan torque specifications, covering values, influencing factors, and proper tightening procedures to prevent leaks and ensure reliability.
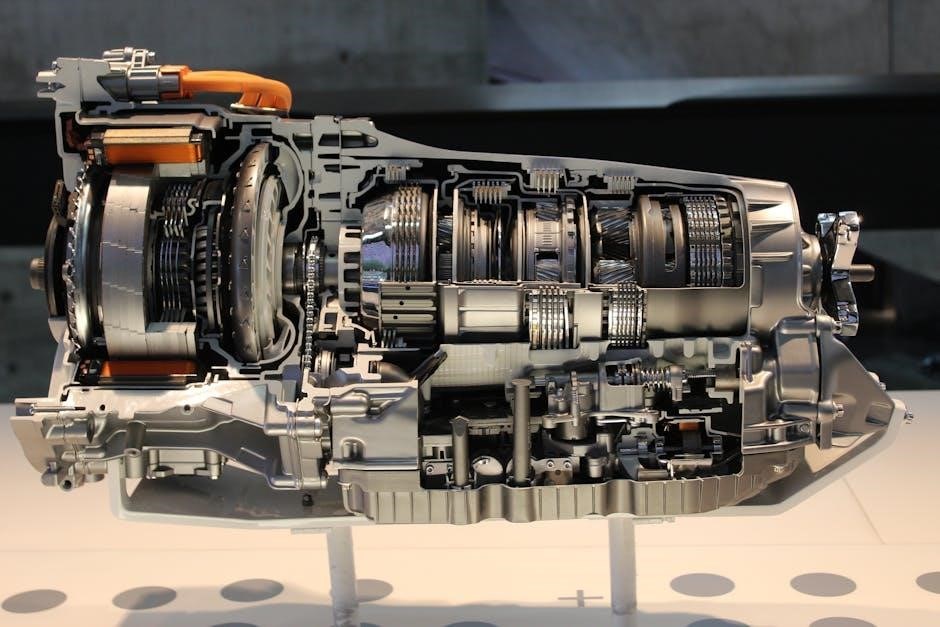
The 6L80 is a robust and widely-used six-speed automatic transmission, frequently found in General Motors trucks and performance vehicles like the Chevrolet Corvette and Cadillac CTS-V. Known for its durability and smooth shifting, proper maintenance is crucial for longevity. A key aspect of this maintenance involves correctly torquing the transmission pan bolts during fluid and filter changes. Incorrect torque can lead to frustrating oil leaks or, more seriously, pan warping, potentially causing significant transmission damage. Understanding the specific torque requirements and procedures is therefore essential for any mechanic or enthusiast working with this transmission.
Understanding the Importance of Correct Torque Specs
Adhering to precise torque specifications when installing the 6L80 transmission pan is paramount for a reliable seal and long-term performance. Under-torquing can result in oil leaks, leading to low fluid levels and potential transmission failure. Conversely, over-torquing risks stripping the bolt threads or warping the pan itself, creating an irreparable seal. Utilizing a calibrated torque wrench and following the recommended sequence ensures even pressure distribution. Ignoring these specifications can void warranties and necessitate costly repairs, emphasizing the critical nature of accurate torque application.

Identifying 6L80 Transmission Pan Bolts
The 6L80 transmission pan typically utilizes 6mm bolts for secure attachment, requiring specific torque values to maintain a proper seal and prevent damage.
Bolt Size and Type (6mm Bolts)
The 6L80 transmission pan predominantly employs 6mm bolts for fastening, a standard size ensuring compatibility and ease of replacement. These bolts are crucial for maintaining proper pan-to-case sealing, preventing fluid leaks, and ensuring optimal transmission performance. Identifying the correct bolt size is paramount before commencing any repair or maintenance work. Using incorrect fasteners can lead to stripped threads, inadequate clamping force, and ultimately, transmission failure. Always verify the bolt size before tightening, and consider replacing old bolts with new ones to guarantee a secure and reliable connection.
Material Composition of Pan Bolts
Typically, 6L80 transmission pan bolts are constructed from high-strength steel alloys, designed to withstand the stresses associated with thermal expansion and contraction cycles, as well as the constant vibration within the transmission system. Many bolts feature a protective coating, such as zinc or phosphate, to resist corrosion and prevent seizing. The specific alloy composition varies between manufacturers, but generally prioritizes durability and resistance to fatigue. Ensuring the bolts are free from damage, like stripped heads or corroded threads, is vital for maintaining a secure and leak-free seal.

Recommended Torque Specifications
Initial torque should be around 96 inch-pounds, followed by a final snug tightening to ensure proper gasket compression and prevent potential oil leaks.
Initial Torque Value (Approximately 96 inch-pounds)
When initially installing the 6L80 transmission pan, a torque value of approximately 96 inch-pounds is generally recommended for the 6mm bolts. This first pass doesn’t aim for final compression, but rather evenly distributes the load across all fasteners. It’s crucial to use a calibrated torque wrench for accuracy. Some experienced technicians suggest “snugging” the bolts instead of strictly adhering to this value, prioritizing even pressure. Avoid over-tightening at this stage, as it can potentially damage the pan or gasket. This initial torque prepares for the final, more precise tightening sequence.
Final Torque Value & Snugness Considerations
After the initial torque application, a final tightening pass is essential. While 96 inch-pounds remains a common guideline, “snugness” is frequently cited as equally effective, particularly by experienced mechanics. This involves tightening the bolts firmly, but without excessive force. Over-torquing risks stripping threads or warping the pan. Ensure even pressure distribution using a cross-pattern sequence. Regularly check your torque wrench calibration for accuracy. Remember, the goal isn’t necessarily a precise number, but a secure, leak-free seal achieved through consistent and careful application of force.

Factors Influencing Torque Values
Bolt material, pan composition (aluminum or steel), and gasket type significantly impact optimal torque. Coatings and material properties dictate necessary tightening force.
Bolt Material and Coating
The 6L80 transmission pan typically utilizes 6mm bolts, and their material composition and coating play a vital role in achieving accurate torque specifications. These bolts are often manufactured from high-strength steel, ensuring durability and resistance to stretching under load. However, the presence of a coating, such as zinc or phosphate, can significantly alter the friction characteristics between the bolt and the pan.
A coated bolt generally requires a slightly lower torque value compared to an uncoated one to achieve the same clamping force. Ignoring this factor can lead to over-tightening, potentially damaging the threads or warping the pan. Always consider the specific coating when referencing torque specs, and if unsure, err on the side of caution.
Pan Material (Aluminum vs. Steel)
The material of the transmission pan – whether aluminum or steel – profoundly impacts the required torque specifications. Aluminum pans, commonly offered by aftermarket suppliers like PPE, are lighter but softer than steel. This necessitates a lower torque value to prevent thread stripping or pan deformation during installation.
Steel pans, being more robust, can generally withstand higher torque loads. However, exceeding recommended torque on any pan material risks warping, leading to leaks. Always verify the pan material and consult the corresponding torque specifications. Using a torque value intended for a steel pan on an aluminum pan is a common and costly mistake.
Gasket Type (Rubber vs. Paper)
The type of gasket used significantly influences the necessary transmission pan torque. Traditional paper gaskets require a specific, often lower, torque to achieve proper compression without tearing or blowing out. Rubber gaskets, however, are more pliable and conform better to uneven surfaces.
Consequently, rubber gaskets generally require a slightly higher torque value to ensure a complete seal. Over-torquing either type can lead to gasket failure or pan distortion. Always refer to the gasket manufacturer’s recommendations alongside the 6L80 transmission specifications for optimal results and leak prevention;
Torque Sequence for the Transmission Pan
Employing a cross-pattern tightening method is crucial for even pressure distribution, preventing warping and ensuring a secure, leak-free seal on the 6L80 pan.
Cross-Pattern Tightening Method
The cross-pattern tightening method is paramount when securing the 6L80 transmission pan. Begin by loosely installing all pan bolts, then progressively tighten them in a criss-cross sequence. This ensures even distribution of clamping force across the entire pan surface, minimizing the risk of warping or distortion. Avoid fully tightening any single bolt before moving to its diagonally opposite counterpart. This gradual, alternating approach prevents localized stress and promotes a uniform seal between the pan and the transmission housing, ultimately reducing the potential for oil leaks and maintaining optimal transmission performance.
Importance of Gradual Tightening
Gradual tightening is critical for the 6L80 transmission pan installation. Rushing the process and immediately applying the final torque specification to each bolt can lead to pan warping, especially with aluminum pans. Instead, employ multiple passes, incrementally increasing the torque with each cross-pattern sequence. This allows the gasket to compress evenly and conform to the mating surfaces. A controlled approach minimizes stress on the pan and bolts, preventing distortion and ensuring a reliable, leak-free seal. Prioritize even pressure distribution over speed for long-term transmission health.

Tools Required for Accurate Torque Application
A calibrated torque wrench and the correct socket size are essential for precise 6L80 pan bolt tightening, preventing over or under-torque issues.
Torque Wrench Calibration
Maintaining a properly calibrated torque wrench is paramount for accurate 6L80 transmission pan bolt tightening. Inaccurate torque readings can lead to oil leaks from under-tightened bolts or, conversely, pan warping and thread damage from over-tightening. Calibration should be performed annually, or more frequently with heavy use. Several professional calibration services are available, or you can utilize calibration testing equipment if proficient. Regularly verifying the wrench’s accuracy ensures consistent and reliable torque application, safeguarding the transmission’s integrity and preventing costly repairs. A reliable torque wrench is a crucial investment.
Socket Type and Size
When applying torque to the 6L80 transmission pan bolts, utilizing the correct socket type and size is essential. The 6L80 typically employs 6mm bolts, necessitating a 6mm socket. A six-point socket is strongly recommended over a twelve-point, as it provides a more secure grip and minimizes the risk of rounding the bolt heads. Employing a high-quality socket made from durable materials prevents slippage and ensures complete torque transfer. Avoid using impact sockets for torque application, as they are designed for loosening, not precise tightening, and can compromise accuracy.
Potential Issues from Incorrect Torque
Improper torque can lead to significant problems, including frustrating oil leaks and, in more severe cases, warping of the transmission pan itself, causing failures.
Oil Leaks
Insufficient torque on the 6L80 transmission pan bolts is a primary cause of oil leaks. When bolts aren’t tightened to the specified 96 inch-pounds (or snug), a proper seal isn’t achieved between the pan and the transmission housing. This allows transmission fluid to escape, potentially leading to low fluid levels and subsequent transmission damage. Conversely, overtorquing can strip the threads or warp the pan, also resulting in leaks. Regularly inspect the pan gasket area for any signs of fluid seepage, especially after a pan removal and reinstallation. Addressing leaks promptly prevents more extensive and costly repairs.
Pan Warping
Applying incorrect torque to the 6L80 transmission pan bolts can easily lead to pan warping, particularly with aluminum pans. Overtightening creates uneven pressure, distorting the pan’s flat surface and breaking the seal with the transmission housing. This results in frustrating oil leaks, even with a new gasket. Warping compromises the structural integrity of the pan itself, potentially causing further damage. Using a torque wrench and following the correct cross-pattern tightening sequence is crucial. Inspect the pan for flatness before reinstallation; a warped pan should be replaced to ensure proper function.
Warranty Information Related to Transmission Components
PPE offers limited lifetime warranties on cast aluminum pans and coolers, with shorter durations for manifolds, up-pipes, and other product lines.
PPE Product Warranties (Cast Aluminum Pans, Coolers, etc.)
PPE (Performance Products Enterprises) provides robust warranty coverage for its 6L80 transmission components. Notably, all PPE cast aluminum pans and transmission coolers are backed by a limited lifetime warranty, ensuring long-term durability and customer satisfaction. Slightly shorter coverage applies to other products; PPE manifolds and up-pipe kits have a three-year limited warranty. All remaining PPE products carry a one-year limited warranty from the original purchase date, covering parts within the kit. Warranty claims are limited to the original buyer and the components included in the specific product kit.
General Warranty Coverage for 6L80 Parts
While PPE offers specific warranties on its products, general warranty coverage for 6L80 parts varies significantly depending on the manufacturer and retailer. Most aftermarket components come with a one-year limited warranty against defects in materials and workmanship. OEM (Original Equipment Manufacturer) parts typically have a 12-month/12,000-mile warranty. It’s crucial to retain all purchase receipts and documentation for warranty claims. Proper installation, following recommended torque specifications, is often a prerequisite for warranty validation, preventing issues related to improper assembly.

Resources for 6L80 Transmission Rebuilding
Comprehensive rebuild specifications documents, solenoid identification guides, and clutch application charts are readily available online, aiding in successful 6L80 transmission overhauls.
Comprehensive Rebuild Specifications Documents
Detailed documents outlining the complete 6L80 transmission rebuild process are crucial for a successful overhaul. These resources typically encompass clutch clearances, band adjustments, and precise torque specifications for all components, including the transmission pan. They also provide valuable information regarding solenoid identification and application, ensuring correct functionality post-rebuild. Furthermore, these documents often include clutch application charts, connector pinouts, check ball locations, and even technical tips – like proper center support snap ring installation – to guide technicians through each step of the process, maximizing efficiency and minimizing errors.
Solenoid Identification and Application
Accurate solenoid identification is paramount during a 6L80 transmission rebuild, as incorrect application can lead to significant performance issues. Comprehensive rebuild specifications documents detail each solenoid’s function and location within the transmission. These resources provide connector pinouts, enabling proper wiring and electrical connectivity. Understanding the specific application of each solenoid – whether it controls shift timing, torque converter clutch engagement, or other functions – is vital for a smooth and reliable transmission operation. Proper identification prevents misdiagnosis and ensures optimal gear selection and overall driveability.

Specific Vehicle Applications (GMC Sierra 1500 2007-2013)
Factory torque values for GMC Sierra 1500s (2007-2013) with the 6L80 transmission include specifications for the case, valve body, and pan bolts.
Factory-Specified Torque Values for Case, Valve Body, and Pan Bolts
Determining precise factory torque values is crucial for a reliable 6L80 transmission rebuild or repair, particularly for the case, valve body, and pan bolts. While specific values can vary slightly based on the exact model year and application within the 2007-2013 GMC Sierra 1500 range, the transmission pan bolts generally fall around 96 inch-pounds. It’s often suggested that “snug” works effectively as well. Valve body and case bolt torque specifications require referencing detailed service manuals for accurate figures, as they are significantly higher and critical for maintaining proper clamping force and preventing leaks. Always consult official GM documentation.
Torque Sequences for Specific Models
While a universal torque sequence isn’t always defined, a cross-pattern tightening method is consistently recommended for the 6L80 transmission pan. This involves tightening bolts in opposing pairs, gradually increasing torque in stages. Begin with the initial torque value (approximately 96 inch-pounds), then proceed to the final snugness check. Specific model variations within the GMC Sierra 1500 (2007-2013) don’t drastically alter this sequence, but always prioritize even pressure distribution. Referencing the vehicle’s service manual will confirm any model-specific nuances for optimal results.