
Gigabyte Z790 Gaming X AX Manual: Comprehensive Article Plan
This detailed guide comprehensively covers the Gigabyte Z790 Gaming X AX motherboard. It includes installation, BIOS setup, storage configuration, and troubleshooting, referencing official manuals and online resources.
The Gigabyte Z790 Gaming X AX is a high-performance motherboard designed for Intel’s 12th, 13th, and 14th generation processors. It caters to gamers, enthusiasts, and professionals seeking a robust platform for demanding tasks. This motherboard boasts a feature-rich design, incorporating cutting-edge technologies like PCIe 5.0 support and DDR5 memory compatibility.
This manual guide aims to provide a comprehensive overview of the Z790 Gaming X AX, assisting users through every stage – from initial setup and hardware installation to BIOS configuration and advanced troubleshooting. Resources like the official Gigabyte documentation (available at download.gigabyte.com) and community forums will be referenced. Understanding the specifications and capabilities of this board, as detailed in available manuals, is crucial for maximizing its potential. It’s designed to be a user-friendly resource, ensuring a smooth and efficient building experience.
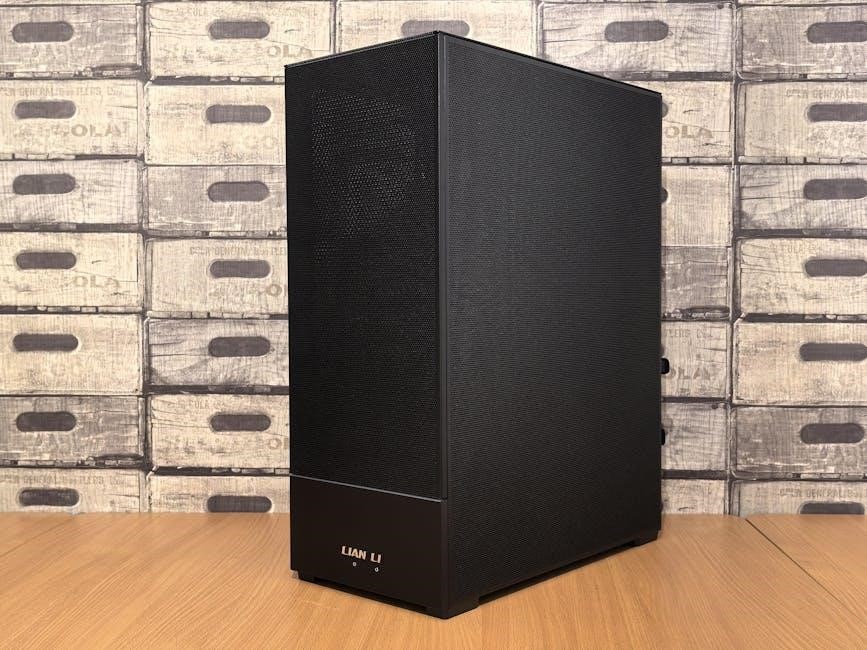
Unboxing and Package Contents
Upon opening the Gigabyte Z790 Gaming X AX package, users can expect a carefully arranged selection of components. Typically, the box includes the motherboard itself, securely nestled in an anti-static bag and protective foam. Essential accessories are also present, such as the I/O shield, which fits into the rear panel of the computer case.
Connectivity is covered with SATA cables for traditional storage devices. Documentation, including a quick installation guide and a comprehensive user manual (available for download – see gigabyte.com), provides crucial information. Often, Gigabyte includes case badges and potentially M.2 screws and standoffs. Verify all listed components are present before proceeding. Referencing the official manual ensures you understand the purpose of each item and facilitates a smooth setup process. Missing components should be reported to the retailer immediately.
Motherboard Overview & Key Features
The Gigabyte Z790 Gaming X AX motherboard is designed for high-performance Intel 12th/13th generation processors. It boasts a robust power delivery system, ensuring stable operation even under heavy loads. Key features include a stylish design with effective thermal solutions, utilizing heatsinks to dissipate heat from critical components like the VRMs and chipset.
Connectivity is a strong point, offering multiple USB ports, including USB 3.2 Gen 2×2 for rapid data transfer. The board supports PCIe 5.0 for next-generation graphics cards and SSDs, alongside ample PCIe 4.0 slots for expansion. Integrated Wi-Fi 6E and 2.5GbE LAN provide fast and reliable networking. The Z790 chipset enables overclocking capabilities, allowing enthusiasts to push their hardware to its limits. Detailed specifications and layout diagrams are available in the official user manual.
Chipset and Supported CPUs
The Gigabyte Z790 Gaming X AX utilizes the Intel Z790 chipset, a high-end platform designed for unlocking the full potential of 12th and 13th generation Intel Core processors. This chipset supports CPU overclocking, allowing users to enhance performance beyond stock settings. Specifically, it’s compatible with Intel Core i9, i7, and i5 processors in the LGA 1700 socket.
The Z790 chipset provides enhanced features like increased PCIe lanes, enabling support for multiple high-speed devices. It also facilitates advanced storage options, including multiple M.2 SSDs. The motherboard’s compatibility list, detailed in the manual, confirms supported CPU models and recommended BIOS versions for optimal performance. Ensure your CPU is listed for guaranteed functionality and access to all features. Proper CPU selection is crucial for maximizing the Z790’s capabilities.
Memory Support (DDR5)
The Gigabyte Z790 Gaming X AX motherboard supports DDR5 memory, the latest generation of RAM technology, offering significantly faster speeds and increased bandwidth compared to DDR4. It features four DIMM slots, allowing for a maximum memory capacity of up to 128GB. The manual specifies supported memory speeds, currently reaching up to 7200MHz or even higher with overclocking (XMP – Extreme Memory Profile).
Optimal performance relies on using memory modules listed in the motherboard’s QVL (Qualified Vendor List), ensuring compatibility and stability. The Z790 chipset benefits from DDR5’s improved efficiency and responsiveness, enhancing overall system performance, particularly in demanding applications and games. Dual-channel memory architecture is supported, maximizing bandwidth when using paired memory modules. Refer to the manual for detailed instructions on installing and configuring RAM for optimal results.
Expansion Slots (PCIe 5.0 & PCIe 4.0)
The Gigabyte Z790 Gaming X AX provides a robust set of expansion slots for various components. It features one PCIe 5.0 x16 slot, designed for the latest high-performance graphics cards, offering double the bandwidth of PCIe 4.0. This ensures future-proofing and optimal performance for demanding gaming and professional workloads. Additionally, the motherboard includes several PCIe 4.0 slots – one x16 (running at x4) and two x1 slots.

These PCIe 4.0 slots support a wide range of expansion cards, including high-speed SSDs, capture cards, and network adapters. The manual details the lane allocation for each slot, crucial for understanding potential bandwidth limitations when multiple devices are installed. Proper configuration maximizes performance and avoids conflicts. The combination of PCIe 5.0 and 4.0 slots provides flexibility and caters to both current and future hardware needs.
Hardware Installation Guide
This section details the physical installation process of components onto the Gigabyte Z790 Gaming X AX motherboard. It begins with careful preparation, emphasizing electrostatic discharge (ESD) precautions to protect sensitive electronics. The guide stresses the importance of referring to the motherboard’s layout diagram for correct component placement. Subsequent steps cover CPU installation, ensuring proper alignment with the socket and secure latching.
Detailed instructions are provided for CPU cooler installation, accommodating various cooler types and mounting mechanisms. Memory (RAM) installation follows, highlighting the correct DIMM slot configuration for optimal dual-channel or quad-channel performance. The manual illustrates how to securely seat the RAM modules until the clips click into place. Finally, it briefly introduces the installation of expansion cards and storage devices, deferring detailed configuration to later sections.
CPU Installation
Before beginning, ensure the system is powered off and disconnected from the mains. Open the CPU socket lever on the Gigabyte Z790 Gaming X AX. Carefully align the CPU with the socket, matching the golden triangle on the CPU to the corresponding corner on the socket. Gently place the CPU into the socket – do not force it. It should sit flush without any pressure.
Once seated, close the CPU socket lever, securing the processor. This requires a firm but gentle action. Incorrect installation can damage the CPU or socket. Verify the CPU is correctly installed by visually inspecting its alignment. The manual emphasizes the importance of handling the CPU by its edges to avoid damaging the pins. Proper installation is crucial for system stability and performance. Refer to diagrams in the manual for visual guidance throughout this process.
CPU Cooler Installation
After CPU installation, apply thermal paste if your cooler doesn’t have pre-applied paste. A pea-sized amount centered on the CPU is generally sufficient. Mount the CPU cooler bracket to the motherboard, ensuring it aligns with the mounting holes. The Gigabyte Z790 Gaming X AX supports various cooler types, so consult the cooler’s manual for specific bracket instructions.
Carefully position the cooler onto the CPU, aligning it with the bracket. Secure the cooler using the provided screws or clips, tightening them in a diagonal pattern to ensure even pressure. Avoid over-tightening, which could damage the motherboard or CPU. Connect the cooler’s fan cable to the designated CPU fan header on the motherboard. Verify the cooler is firmly attached and doesn’t wobble. Proper cooling is vital for maintaining CPU performance and preventing overheating.

Memory (RAM) Installation
Before installing RAM, ensure the system is powered off and grounded. Locate the DDR5 memory slots on the Gigabyte Z790 Gaming X AX motherboard – typically color-coded for dual-channel configuration. Open the retaining clips on both ends of the desired memory slots. Align the notch on the RAM module with the notch in the slot.
Apply firm, even pressure to both ends of the RAM module until it clicks securely into place and the retaining clips automatically close. If the clips don’t close, ensure the module is fully seated. For dual-channel operation, install RAM modules in matching color slots. Consult the motherboard manual for optimal slot population. Verify compatibility with the motherboard’s QVL (Qualified Vendor List) for best results. Incorrect installation can prevent the system from booting.
BIOS Setup and Navigation
Accessing the BIOS is typically done by pressing the “Delete” key repeatedly during the system’s startup sequence, immediately after powering on. The Gigabyte Z790 Gaming X AX utilizes a user-friendly UEFI BIOS interface. Upon entering, you’ll find several tabs for different settings – “M.I.T.” for overclocking, “Settings” for system configuration, “Boot” for boot order adjustments, and “Exit.”
Navigation is primarily achieved using the keyboard: arrow keys for movement, Enter to select, and Esc to go back. The F1 key often provides contextual help. Within the BIOS, you can adjust boot priorities (setting your primary drive), enable XMP for optimal RAM performance, and monitor system temperatures. Save changes before exiting using the F10 key, confirming with “Yes”. Incorrect BIOS settings can lead to system instability, so proceed with caution.
Accessing the BIOS
To enter the BIOS setup on the Gigabyte Z790 Gaming X AX, power on your system and repeatedly press the “Delete” key during the initial startup phase. This key is the most common method, but in some cases, the “F2” key might be required – consult your motherboard manual for confirmation. The timing is crucial; start pressing the key immediately after powering on, before the operating system begins to load.
If the system boots directly into Windows, you may need to use the Advanced Startup Options within Windows to access the UEFI firmware settings. Alternatively, a dedicated Q-Flash Plus button on the rear I/O panel allows BIOS flashing without a CPU, RAM, or GPU. Ensure the BIOS file is correctly named and placed on a FAT32 formatted USB drive; Successful access will display the Gigabyte UEFI BIOS interface, ready for configuration.
BIOS Interface Overview
The Gigabyte Z790 Gaming X AX BIOS features a user-friendly UEFI interface, typically organized into several key sections. “Easy Mode” provides simplified settings for quick adjustments like boot order and fan control. “Advanced Mode” unlocks the full range of configuration options, categorized for clarity.
Key sections include “M.I.T.” (Motherboard Intelligent Tweaker) for overclocking and performance tuning, “Settings” for system configuration, “Boot” for boot device prioritization, and “Exit” for saving changes and exiting. Within M.I.T., you can adjust CPU ratios, voltages, and memory timings. The “System Health Status” displays vital system information like temperatures and voltages. Navigation is primarily done using the keyboard – arrow keys, Enter, and Esc are essential. Detailed tooltips are available for each setting, aiding in understanding their function.
Storage Configuration
The Gigabyte Z790 Gaming X AX offers extensive storage options, supporting both high-speed M.2 SSDs and traditional SATA HDDs/SSDs. Multiple M.2 slots are present, some supporting PCIe 4.0 and potentially PCIe 5.0 for maximum bandwidth, crucial for NVMe SSD performance. SATA ports allow connection of multiple 2.5” or 3.5” drives.
Configuration is managed through the BIOS, where drives are detected and can be assigned boot priority. The BIOS also facilitates RAID configuration (discussed separately). During OS installation, ensure the correct storage controller mode (AHCI or RAID) is selected. For optimal SSD performance, enabling NVMe mode in the BIOS is recommended. Proper cable management and airflow around the M.2 slots are vital to prevent thermal throttling. Regularly check for firmware updates for both the motherboard and SSDs to ensure compatibility and stability.
M.2 SSD Installation and Configuration
Installing an M.2 SSD on the Gigabyte Z790 Gaming X AX involves locating the M.2 slots (refer to the motherboard manual for precise locations). Carefully insert the SSD into the slot at a slight angle, then secure it with the provided screw. Ensure the SSD is firmly seated.
Configuration within the BIOS is essential. Access the BIOS and navigate to the storage settings. The SSD should be detected automatically. Verify it’s recognized and set the boot priority if desired. For NVMe SSDs, confirm that NVMe mode is enabled for optimal performance. Some slots may share bandwidth with other devices; consult the manual for specific limitations. Thermal management is crucial; consider using M.2 heatsinks, especially for high-performance drives. Regularly check for SSD firmware updates via the manufacturer’s website.

SATA HDD/SSD Installation and Configuration
Connecting SATA drives to the Gigabyte Z790 Gaming X AX is straightforward. Locate the SATA ports on the motherboard (consult the manual for their positions). Connect a SATA data cable from the drive to a port, and a SATA power cable from the power supply. Ensure secure connections.

BIOS configuration is then required. Enter the BIOS setup and navigate to the storage settings. The connected drives should be automatically detected. Verify their presence and configure the boot order if necessary. You can also enable or disable AHCI mode for optimized performance. RAID configurations are possible through the BIOS, but require careful planning. Proper cable management is recommended to maintain airflow within the case. Regularly check the drive’s health using SMART monitoring tools available within the BIOS or through dedicated software.

RAID Configuration
The Gigabyte Z790 Gaming X AX supports various RAID levels (0, 1, 5, 10) for enhanced performance or data redundancy. Access the RAID configuration utility during the boot process, typically by pressing a designated key (check the motherboard manual). This utility allows you to select the desired RAID level and the participating SATA drives.
RAID 0 stripes data across multiple drives for increased speed, but offers no redundancy. RAID 1 mirrors data, providing redundancy but halving storage capacity. RAID 5 requires at least three drives and offers a balance of performance and redundancy. RAID 10 combines mirroring and striping.
Carefully consider your needs before configuring RAID. Data loss can occur during setup, so back up important data beforehand. The RAID configuration is stored in the BIOS, so changes require a reboot. Ensure all drives are identical for optimal performance and compatibility.
Connectivity Options
The Gigabyte Z790 Gaming X AX offers a comprehensive suite of connectivity options. The rear panel I/O includes USB 3;2 Gen 2×2 Type-C, multiple USB 3.2 Gen 2 and Gen 1 ports, HDMI 2.1, DisplayPort, and Gigabit Ethernet. Audio connectivity is provided via gold-plated jacks. A BIOS flashback button is also present for easy BIOS updates.
Internally, the motherboard features multiple USB headers for front panel connectivity, as well as connectors for case fans, RGB lighting, and audio. Multiple M.2 slots support high-speed NVMe SSDs. SATA ports accommodate traditional hard drives and SSDs. The board also includes headers for Thunderbolt (if supported by the CPU).
Proper connection of all cables is crucial for optimal system functionality. Refer to the motherboard manual for the exact location and pinout of each connector. Ensure all cables are securely fastened to prevent disconnections.
Rear Panel I/O Ports
The Gigabyte Z790 Gaming X AX’s rear panel boasts a robust selection of I/O ports. You’ll find one USB 3.2 Gen 2×2 Type-C port, offering incredibly fast data transfer speeds. Alongside this are several USB 3.2 Gen 2 Type-A ports, and multiple USB 3.2 Gen 1 ports for broader compatibility; For display outputs, it includes HDMI 2.1, capable of supporting high-resolution and refresh-rate monitors, and DisplayPort.

Networking is handled by a Gigabit Ethernet port, ensuring a stable wired connection. Audio connectivity is provided through gold-plated audio jacks, delivering clear and crisp sound. A dedicated BIOS Flashback button allows for easy BIOS updates without needing a CPU or RAM installed. Finally, there’s a PS/2 port for legacy device support.

Carefully connect your peripherals to the appropriate ports for optimal performance and functionality. Refer to the motherboard manual for detailed port descriptions.
Internal Connectors
The Gigabyte Z790 Gaming X AX provides a comprehensive array of internal connectors for expanding functionality. These include multiple USB 3.2 Gen 1 and Gen 2 headers, supporting front panel USB ports and internal devices. Several fan headers are present, allowing for precise control of cooling solutions. A dedicated TPM header enhances system security.
For audio, there are front panel audio connectors. Multiple SATA 6Gb/s connectors support traditional storage devices. The board also features connectors for RGB lighting, enabling customization and synchronization with compatible peripherals. A speaker header is available for system beeps and alerts.
Properly connecting these internal components is crucial for system stability and performance. Consult the motherboard manual for connector locations and pin assignments to avoid damage or malfunction. Careful planning ensures optimal cable management.
Troubleshooting Common Issues
Encountering problems with the Gigabyte Z790 Gaming X AX? Common issues include boot failures, often resolved by clearing the CMOS or checking RAM compatibility. USB port malfunctions can stem from driver conflicts or power delivery problems; ensure proper driver installation and sufficient PSU wattage.
If the system fails to recognize storage devices, verify SATA cable connections and BIOS settings. Network connectivity issues may require driver updates or checking physical connections. Overheating can cause instability; confirm adequate CPU cooler installation and airflow.
Referencing the motherboard manual’s troubleshooting section is vital. Checking the Gigabyte support forums and online communities can provide solutions from other users. Always ensure BIOS is updated to the latest version for improved compatibility and stability. Systematic diagnosis is key to resolving issues efficiently.