
A darkroom is a dedicated space for developing film and printing photographs, offering photographers full creative control over their work. It transforms digital negatives into tangible prints, providing an intimate and rewarding experience. Essential tools like enlargers and safelights enable precise image manipulation, making darkroom photography a unique blend of artistry and technical skill.
What is a Darkroom?
A darkroom is a light-tight space used for processing photographic film and printing images. Equipped with an enlarger, safelight, and chemical trays, it allows photographers to handle light-sensitive materials. The red safelight ensures negatives and papers aren’t exposed, making it essential for traditional film photography to create high-quality, customized prints.
The Importance of a Darkroom in Film Photography
A darkroom is essential for film photographers as it provides complete control over the development and printing process. It allows the transformation of raw negatives into tangible, customized prints, offering a hands-on, artistic experience. The darkroom process enhances creativity and precision, making it a vital tool for achieving unique, high-quality photographic results.
Essential Equipment for a Darkroom
A darkroom requires an enlarger, safelight, chemical trays, print tongs, focus finder, and timer. These tools are crucial for developing film and printing photographs effectively.
The Enlarger: The Heart of the Darkroom
The enlarger is the core equipment in a darkroom, projecting light through negatives to create prints. It allows precise control over image size and focus, ensuring sharp, well-defined results. By adjusting its height and lens, photographers can achieve desired print sizes while maintaining clarity and detail, making it indispensable for producing high-quality photographs.
Safelight: Illumination Without Exposure
A safelight provides controlled illumination in the darkroom, allowing photographers to handle light-sensitive materials without exposure. Typically red in color, it emits wavelengths that orthochromatic papers are less sensitive to, preventing unwanted exposure. This essential tool enables precise work while maintaining the integrity of photographic papers during the printing process.
Chemical Trays and Their Functions
Chemical trays are essential for darkroom printing, holding developers, stop baths, and fixers. They allow controlled movement of prints through each stage, preventing cross-contamination. Designed for gentle agitation, they ensure even chemical flow, crucial for consistent results. Typically, at least three trays are used to separate developer, stop bath, and fixer, maintaining clarity and preventing damage to prints.
Print Tongs: Handling Your Prints Safely
Print tongs are essential tools for handling wet prints, minimizing the risk of marks and blemishes. Using separate tongs for developer, stop bath, and fixer trays prevents cross-contamination. They allow gentle movement of prints through chemical stages, ensuring safe processing and maintaining print quality. Proper use extends the lifespan of your photographic prints.

Setting Up Your Darkroom
Setting up a darkroom involves selecting a suitable space, ensuring light sealing, and proper ventilation. Organize equipment like enlargers, trays, and safelights to create a functional workspace for developing film and printing photos.
Choosing the Right Space
Selecting the right space for your darkroom requires careful consideration. Ideally, choose a room that can be completely darkened, such as a basement or bathroom. Ensure adequate ventilation and sufficient space for essential equipment like enlargers and trays. Any room, including attics or spare bedrooms, can be converted into a functional darkroom with proper light sealing and organization.
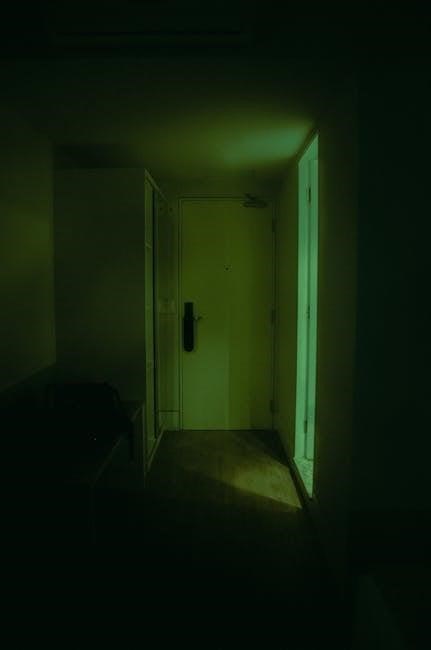
Light Sealing and Ventilation Tips
Ensure your darkroom is completely light-tight to prevent exposure. Use weatherstripping or black curtains to seal gaps. Proper ventilation is crucial to remove chemical fumes; install an exhaust fan or vent. Maintain airflow to prevent fume buildup, ensuring a safe and efficient workspace for developing and printing photographs.
Organizing Your Darkroom Layout
Arrange your darkroom to maximize efficiency and safety. Position the enlarger centrally for easy access, with safelights placed to minimize glare. align chemical trays in order of use, ensuring a smooth workflow. Store paper, negatives, and supplies neatly, keeping essentials within reach. A well-organized layout enhances productivity and prevents accidents, fostering a comfortable workspace for creativity.

The Darkroom Printing Process
The darkroom printing process involves using an enlarger to project negatives onto photo paper, followed by development in chemical trays. Precision and patience yield stunning prints.
Preparing Your Negatives
Preparing negatives involves organizing and cleaning them to ensure optimal printing. Store negatives in protective boxes to prevent damage and dust. Before printing, inspect negatives for fingerprints or debris, as these can affect print quality. Ensure negatives are dry and free of scratches to achieve sharp, clear images in the darkroom.
Creating a Contact Sheet
A contact sheet is made by placing negatives in an enlarger, exposing them onto photo paper, and developing the paper. This step allows photographers to preview images before printing, helping them select the best negatives for enlargement. It’s a crucial step in the darkroom process, saving time and resources by identifying ideal shots efficiently.
Developing and Fixing Your Prints
Developing involves immersing photo paper in chemicals to reveal images. The developer brings out details, while the stop bath halts development. Fixing removes light-sensitive silver halides, stabilizing the image. Proper agitation and timing ensure even processing. After fixing, prints are washed to remove residual chemicals, preparing them for drying and long-term preservation.
Washing and Drying Your Prints
After processing, prints are washed to remove residual chemicals, ensuring longevity. Use running water or specialized wash aids for efficiency. Gently shake excess water and air-dry prints, or ferrotype them for a glossy finish. Avoid direct heat to prevent curling. Handle prints by the edges or use tongs to prevent damage.
Advanced Darkroom Techniques
Explore expert methods like dodging, burning, and split-grade printing to refine your prints. These techniques allow precise control over contrast and tone, enabling artistic enhancements for exceptional results.
Dodging and Burning: Enhancing Your Prints
Dodging and burning are advanced techniques used to selectively lighten or darken areas of a print during exposure. Using tools like dodging wires or masks, photographers can subtly manipulate contrast and tone, enhancing the balance and emotional impact of an image. These methods allow precise control, transforming ordinary prints into extraordinary works of art.
Split-Grade Printing: Precision Control
Split-grade printing offers precise control by separating the printing process into high and low contrast exposures. This technique allows photographers to achieve balanced tonal ranges, enhancing detail in both shadows and highlights. By using different contrast filters, images gain depth and dimension, making split-grade printing a powerful tool for refining prints with exceptional accuracy.
Solarization: Adding Creative Effects
Solarization introduces unique effects by briefly exposing prints to light during development. This technique creates striking, high-contrast images with darkened mid-tones and lightened highlights. Popularized by artists like Man Ray, solarization adds an ethereal quality, transforming ordinary prints into abstract, visually intriguing works that stand out in darkroom photography.

Safety in the Darkroom
Ensure safety by protecting eyes and skin from chemicals, maintaining proper ventilation, keeping a first aid kit nearby, and having a fire extinguisher readily available.
Handling Chemicals Safely
Always wear gloves and goggles to protect skin and eyes from darkroom chemicals. Ensure proper ventilation to prevent inhaling fumes. Use tongs to handle prints, avoiding direct contact. Store chemicals in labeled containers and follow instructions carefully. Keep a first aid kit nearby and wash hands thoroughly after handling any darkroom materials.
Proper Ventilation Practices
Ensure good airflow in your darkroom to prevent inhaling chemical fumes. Install vents or use fans to circulate air, especially when handling developers and fixers. Maintain cross-ventilation to remove hazardous vapors efficiently. Avoid windows that allow direct sunlight to maintain consistent temperatures and prevent overexposure of light-sensitive materials.

Troubleshooting Common Issues
Identify print defects like overexposure or uneven development. Adjust exposure times, chemical temperatures, or agitation techniques. Regularly maintain equipment to ensure consistent results and avoid recurring problems.
Identifying and Solving Print Defects
Common print defects include overexposure, underdevelopment, and dust specks. Check for improper chemical mixing or inconsistent agitation. Inspect negatives for scratches or debris. Adjust exposure times, ensure accurate developer temperatures, and clean equipment regularly. Use magnifiers to spot issues early, and maintain a dust-free environment to prevent flaws in your prints.
Adjusting Your Development Times
Development times impact print contrast and detail. Start with recommended times, then adjust based on test prints. Temperature, agitation, and chemical strength affect results. Use a timer for accuracy. Overdevelopment can cause blown highlights, while underdevelopment may result in flat prints. Fine-tune in 10-15% increments for optimal outcomes. A stop bath helps standardize the process for consistent results.

DIY Darkroom Solutions
Create a functional darkroom using household items. Repurpose spaces like bathrooms or closets. Temporary solutions include blackout curtains and DIY safelights. Start small, experiment, and adapt to your needs for a cost-effective setup.
Creating a Temporary Darkroom
Easily transform any space into a temporary darkroom using blackout curtains and red LED lights for safe illumination.
Invest in essential tools like chemical trays and print tongs to handle your work safely.
Ensure proper ventilation to prevent chemical fumes and maintain a safe workflow.
This setup provides a practical way to experiment with darkroom photography techniques without a permanent setup.
Repurposing Household Items
Transform household items into darkroom essentials to save costs. Use plastic containers as chemical trays and cardboard for light sealing. A household lamp with a red filter can substitute a safelight. Even old towels or sponges can help in cleaning and blotting prints, making your darkroom setup both practical and budget-friendly.
Darkroom Community and Resources
Engage with local photography groups, attend workshops, and join online forums to connect with fellow enthusiasts. Resources like darkroom rentals and online tutorials foster creativity and learning.
Local Darkroom Rentals and Workshops
Many cities offer darkroom rentals and workshops, providing access to equipment and expert guidance. These spaces are ideal for learning traditional techniques, experimenting with new methods, and connecting with fellow photographers. Workshops often cover topics like film development and printing, while rentals allow hands-on practice in a professional environment. Check local photography clubs or online listings to find nearby options.
Online Communities and Forums
Online communities and forums are invaluable resources for darkroom enthusiasts, offering tips, tutorials, and troubleshooting advice. Platforms like Reddit’s r/photography and specialized forums provide spaces to share knowledge and learn from experienced photographers. These communities often discuss techniques, recommend equipment, and showcase work, fostering collaboration and growth in the darkroom photography community.
Darkroom photography offers a unique, hands-on creative experience, transforming negatives into tangible art. It demands patience, skill, and experimentation, rewarding photographers with a deep connection to their craft and the joy of seeing their vision realized in a physical form.
The Rewards of Darkroom Photography
Darkroom photography offers a deeply rewarding experience, combining creativity with hands-on craftsmanship. It allows photographers to transform raw negatives into tangible, unique prints, fostering a sense of accomplishment and connection to their work. The process encourages patience, experimentation, and artistic expression, making every print a personal triumph and a lasting source of pride.
Encouragement to Experiment
Embrace the freedom to experiment in the darkroom, where trial and error lead to unique, creative outcomes. Try different techniques, chemicals, and tools to discover your personal style. Even mistakes can yield surprising results, making each session a learning opportunity. Don’t hesitate to push boundaries and explore the limitless possibilities of darkroom photography.
Further Reading and Resources
Explore books like Dark Room Photography Guide and online tutorials for in-depth techniques. Visit forums and workshops to enhance your darkroom skills and stay updated on best practices.
Recommended Books and Guides
Essential reads include Dark Room Photography Guide by Marissa Sampson and The Darkroom Handbook. These resources provide detailed techniques for film development and printing. Online forums like Parallax Photographic Coop offer comprehensive guides, while workshops from The Dark Room Cairo share expert tips. These materials are invaluable for mastering darkroom photography skills and techniques.
Online Tutorials and Videos
Online platforms like YouTube and photography websites offer extensive tutorials and videos on darkroom techniques. Channels and forums provide step-by-step guides for film development, printing, and advanced methods. Resources like Parallax Photographic Coop and The Dark Room Cairo workshops share expert tips, making it easier for photographers of all levels to refine their darkroom skills and explore creative possibilities.